


 Network Security
 Vulnerability Management
 Privileged Access Management
  Endpoint Security
 Threat Hunting
 Unified Endpoint Management
 Email & Collaboration Security


Contents:
What happens when you want to share your computer with someone else, but you’re really not in a charitable mood? Create a new user, of course. I know that it sounds like a no-brainer, yet, truth be told, following Windows 10’s account-creation walkthroughs are not what you might call ‘on point’. So, how to create a new user on Windows 10?
So, if you’re still searching for other UAC-creation step-by-steps guides, look no further because I got you covered. This not-so-small guide will walk you through the entire process. Here you will learn all about the user account GUI, how to enable ‘God mode’ on your PC, and how to turn your machine into a kiosk computer. So, without further ado, here’s how account-creation works in Windows 10.
How to create a new user on Windows 10 (Easy Way)
Compared to older Windows builds (XP, Windows 7 or Vista), it’s quite easy to create a new user on Win 10. Now, why would someone do that? Well, creating one or several users on the same machine isn’t some whim, but a very ‘hygienic’ cybersecurity practice. Even if you’re the one and only owner of the PC, it’s still a good idea to use a non-administrative account in case you wind up on the wrong side of the Internet (best time to wonder about how to create a Windows 10 account).
Doesn’t matter what kind of malware your computer picks up – running your PC on a typical, non-admin account, ensures that the ‘nastinesses’ can’t gain a foothold in the system and start messing around with functions and processes (i.e. boot. ini, msdos.sys, autoexec.bat, io.sys, svchost.exe).

Adding a new user through Accounts’ GUI
Now, the fastest way to create a new user account on Windows 10 is through Settings. Here’s what you’ll need to do:
Step 1. Hit or tap the Start button.
Step 2. Click or tap on the Settings button (that would be the “gear” icon). You can also access Settings by hitting the Windows key on your keyboard and writing “Settings” in the search bar.
Step 3. In Settings, click or tap on Accounts (the icon should be right under Network & Internet).
Step 4. Under Accounts, click or tap on Family & other users.
Step 5. Look under Other users and click on the “+” (plus sign) next to Add someone else to this PC to create a new account on your machine.
Step 6. Choose how the new user will log in his account: Xbox, Office Online, OneDrive, Office, or Skype. Type the address in the bar and hit the Next button.
Step 7. Review the details and press the Finish button to complete the registration process.
That’s it – the new user can log in by typing in his Microsoft username and password. Now, you should keep in mind that this method can only be used in conjunction with one of the above-mentioned accounts. If you want to create a local account (no online account verification required), follow the steps below.
How to create a local account with Windows 10
Source: onMSFT
Step 1. Click or tap on the Start button.
Step 2. Head to Settings.
Step 3. Click or tap on Accounts.
Step 4. Go to Family & other users.
Step 5. Under Other users, click or tap on Add someone else to this PC.
Step 6. In the bottom part of the page, click or tap the hyperlink reading I don’t have this person’s sign-in information.
Advice: If the user you’re about to add doesn’t have a Microsoft account, don’t mess around with the email and passwords fields located in the upper part of the screen.
Step 7. Click or tap on the hyperlink reading Add a user without a Microsoft account.
Step 8. In the account registration window, enter the name of the person who’s going to use the computer and choose a password (hint: don’t use “1234” or “qwerty”, wink-wink). Reconfirm your password and set a hint. When you’re done, press the Next button to complete the registration process.
Okay, I have to admit that all of these steps seem basic enough, but the good news is that Windows 10’s account-managing platform allows the user (that’s you) to ‘mess’ around with privileges. Let’s assume that the account you’re about to create is for a family member.
If you’re not too comfortable with the idea of letting him or her mess around with certain applications, you can easily restrict access. How to do that, you ask? Easy – just turn the computer in a kiosk, and everything will be hunky-dory.
How to add a user to kiosk
A kiosk-like machine works, more or less, like those public info booths – they can be used to check a destination, look up information about certain tourist traps, etc. Well, you can do the same with a computer if you’re looking to curb an account’s activity. Just follow the steps below to link an account to a kiosk – best answer to how to create a new user on Windows 10 question.
Step 1. Create a new user on your Windows 10 machine using one of the featured methods.
Step 2. When you’re done, head to the Family & other people section.
Step 3. On the right side of the screen, click or tap on the Set up assigned access hyperlink (it’s right at the bottom, right on top of the Set up an account for taking tests at your school feature).
Step 4. In the next screen, link your new user account to the kiosk. Just hit the “+” (plus sign) under the choose an account section and, well, choose.
Step 5. After selecting your “kiosk” account, choose the apps that the new user will be allowed to access. You will find this under the account selection section.
That’s about it on how to turn a newly-created account into a kiosk-like user. Sure, you can always sign out from all your online accounts, but why bother when you can select which apps the new user can access. Several clicks later, the account’s ready to be used. And yes, you can stop worrying about someone messing up your Netflix playlist and preferences.
How to set up a test/school user account
Of course, you can always take the restriction game to the next level literally turning your computer into a tech version of Hotel California (such a lovely place, indeed). Remember the “Set up an account for taking tests at your school” feature I mentioned earlier?
FYI: it also works for cases when you really don’t want someone to visit non-educational (ahem!) websites. Here’s what you need to know in order to create a test or school account.
Step 1. Go to Accounts.
Step 2. Head to Access work or school.
Step 3. Click or tap on Set Account for taking tests.
Step 4. Select a test-taking account from the drop-down box.
Step 5. Enter the test’s web address.
Hint: if you want to set up an account for your kid, type in the address of an educational website (i.e. National Geographic, Discovery, Sparknotes, Brightstorm). Bear in mind that once the user logs in, he will be unable to access web content other than the website written in this field.
Step 6. Enforce additional restrictions (i.e. require printing, allow screen monitoring and allow text suggestions).
(Optional) You can use Microsoft’s Set up an account for taking tests to feature in conjunction with a lockdown API which basically clamps down the account when the time’s up.
Going Super Saiyan with Your New Account
Source: YouTube
If you want to step up your account-creation game, there’s a way to create a super user. Yes, I know that there shouldn’t be anything else above sysadmin, but Microsoft managed to prove us wrong.
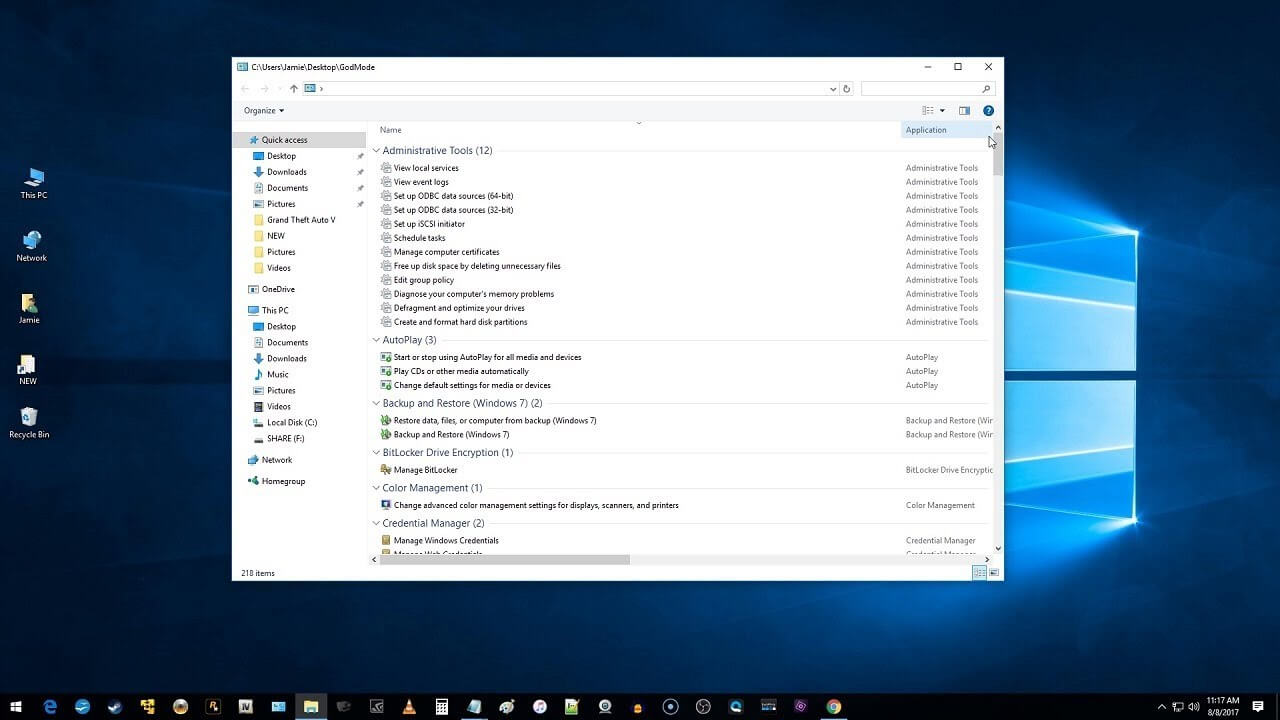
Called the ‘God Mode’, this type of user is not exactly what one might expect, given the name (a gateway to the birthplace of the Internet or something). It’s actually just a regular admin account, but with a couple of nifty twists. Remember when you had to call up the administrative tools menu from control panel each time you wanted to format a disk partition or manage your computer’s certificates?
Well, with ‘God mode’ you will be able to perform these tasks directly from Win Explorer’s quick access wheel or from the desktop. Still wondering about what tools you’ll be able to mess around with while in ‘God Mode’? Here’s a quick rundown.
- Fonts.
- Indexing Options.
- Administrative tools.
- AutoPlay.
- Color Management.
- Date & Time.
- Credential Manager.
- Infrared.
- Internet Options.
- Keyboard + mouse.
- Pen & Touch.
- Phone & Modem.
- Network & Sharing Center.
- Power Options.
- Tablet PC setting.
- Taskbar & navigation.
- System.
- Region.
- User Accounts.
- Windows Defender Firewall.
- Windows Mobility Center.
- Work Folders.
- Speech recognition & more.
Word of advice: before attempting to activate Win10’s ‘Super Saiyan’ mode, keep in mind that having a single user account, supercharged with privileges, makes you an easy target for hackers.
What it all boils down to is this – if a single malware manages to bypass your security, it will have access to everything. And when I say “everything”, I really mean every single and sensitive function of your PC. So, as the saying goes: “tread softly and carry a big gun” (which in this case is a top-notch antimalware software).
How to enable ‘God Mode’ on your PC.
Step 1. Create a new account using one of the methods listed in this guide.
Step 2. Right-click anywhere on your desktop.
Step 3. Highlight and left-click on Folder.
Step 4. Right-click on the newly created folder and hit Rename.
Step 5. In the text field, copy & paste or write the following line:
GodMode. {EDBA470-465E-825C-99712043E01C}
N.B. if you don’t like how “GodMode” sounds, you can replace it with anything you like. Just be sure to write the alpha-numerical string after the name exactly as it is. Otherwise, you will receive an error message reading :“you must type a file name.”
Step 6. Hit Enter or click anywhere on the desktop to continue. If everything’s right, the folder icon will change to a control panel-like icon.
Step 7. Double-clicking on it will take you to Win Explorer’s quick access wheel.
Step 8. Profit and tweak like a boss! The ‘God Mode’ gives you access to over 200 functions, some of them being on the more exotic side (set up iSCSI initiator, set up ODBC data sources for x86 and x64 etc.).
Adding a new user account to your PC (Geek Way)
Source: Microsoft Visual Studio Blog
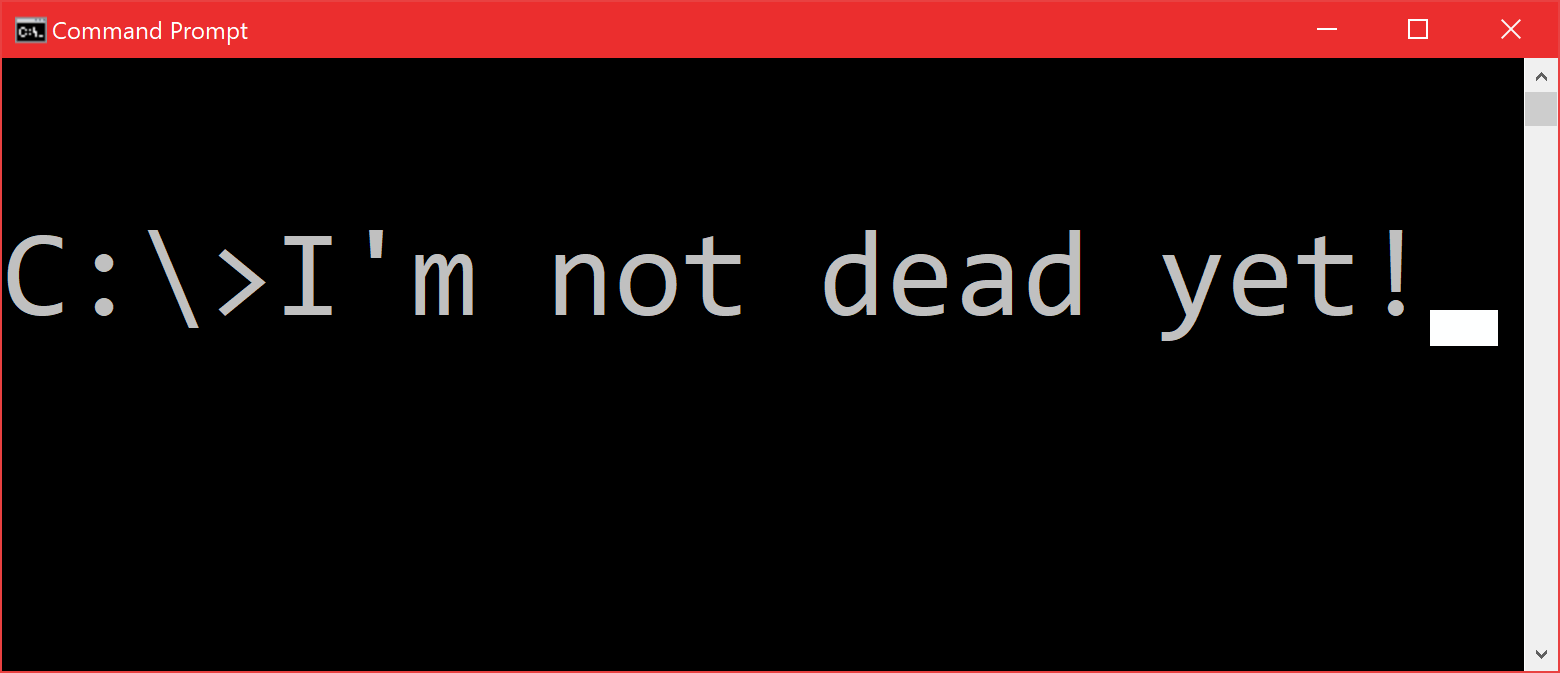
Win10’s account menu is, indeed, the fastest way to create a new user, but not the only one. If you’re up for writing some code lines, I’m going to show you how to do the same thing from CMD (Command Prompt). Let’s dig right into it.
How to create a local account with CMD
Step 1. Fire up the Start menu.
Step 2. Type in “command prompt”.
Step 3. Right-click on the “command prompt” icon and select the Run as administrator option.
Note: it’s required to run CMD in admin mode to create new accounts.
Step 4. When the UAC splash appears, click Yes to continue.
Step 5. Add a new user and assign a password. To do this, type in the following character string:
C:\Windows\system32\net user John newnumberwhodis /add
Note: you can change the name and password with anything you like. Just be sure to type in the “net user” command at the beginning of the code line, and the “/add” at the end.
Step 6. Hit Enter. If done correctly, you will receive the following prompt: “The command completed successfully”. Check your Accounts menu to review the new user’s details.
Note: although I would advise against it, you can create a ‘passwordless’ user (a person can log in without a password). To do that just type in the line above but omit the password string.
Here’s a quick example:
C:\Windows\system32\net user Smith /add
How to grant admin privileges with CMD to a newly created account
Here’s what to do in order to grant admin privileges to the newly made account.
Step 1. Hit the Start menu.
Step 2. Search for “command prompt”.
Step 3. Run CMD (command prompt) as administrator.
Step 4. Type in the following string:
C:\WINDOWS\system32\net localgroup administrators John /add
Note: you can’t directly create an admin account. You’ll first need to create a local user and then update it to admin.
Advanced tweaks and features
- Add new user account to a domain: C:\Windows\system32\net user John newpcwhodis /ADD /DOMAIN.
- Assign a full name to new UAC: C:\Windows\system32\net user John newpcwhodis /ADD /FULLNAME:”John_Delaware”
- Allow new user to change password: C:\Windows\system32\net user John newpcwhodis /ADD /PASSWORDCHG:Yes
- Deny password change request to the new user: C:\Windows\system32\net user John newpcwhodis /ADD /PASSWORDCHG: NO
5 Security Tips to Safeguard Your Newly Created Account
Congrats on creating a new account on your machine! Now, as one good turn deserves another, let’s see what you can do about your account’s cybersecurity. Here are five awesome tips on how to make your PC safe again.
#1. Deploy antimalware/antivirus software on your PC.
Probably the most painless way to ensure that your PC is protected. Now, if you haven’t already deployed an antimalware and antivirus solution on your machine, don’t forget to install it for all users. It’s of no use having an AV/AM on your device if it’s set to protect a single account.
Sure, hackers always gun for accounts with elevated privileges but do keep in mind that an unsecured local account can also become a breaching point. So, as always, if you want to save a couple of bucks, give Starbucks a rest; don’t settle for an inefficient AM/AV solution because that’s how every malware ‘love affair’ begins.
#2. Careful with Plug-and-Play devices
Yes, I know that nowadays it’s all about cloud storage, but there are still a few of us who carry ‘obsolete’ external storage devices such SD cards, flash pens, and portable hard-drives. As one of my colleagues noted in her article on actionable cybersecurity tips, never, ever, should you plug a USB device that came from an unverifiable source.
#3. Need a bathroom/cig break? LOCK UP YOUR PC!
If you’re a slob just like yours truly, then you most certainly don’t lock up the computer each time you go on a lunch break or for a little smoke. Bad decision! By not locking up your PC, you basically tell everyone: “Hey! My computer’s up for grabs. Get it while it’s hot!”.
So, if you want to prevent someone from tampering with your PC (or wake up with Nicholas Cage’s face set as the desktop background), do yourself a favor and lock up your station every time you feel like leaving the room.
#4. Keep tabs on your account
It doesn’t matter if you’re using your brother’s/sister’s/SO’s computer; that account is your responsibility and yours alone! If you come across any activity that may qualify as suspicious, run a quick malware scan, and get in touch with the admin ASAP.
On that note, you should definitely refrain from opening suspicious email attachments, using an unsecured network, or downloading pirated content (i.e. games, movies, software).
#5. Revamp your default password
In most cases, the person creating your account will ask you to change it to something else. Take your cybersecurity game up a notch and choose a strong password. Remember that a solid passkeys should have at least 8 characters. Try a combo of upper- and lowercase letters, symbols, and numbers. You know what they say: there’s safety in numbers; and yes, the longer the password, the harder it will be for someone to crack it open.
Wrap-up
It has certainly been a long trip getting from “how do I create a new UAC?” to “let me add a string in CMD to prevent the user from changing his password”. Always remember that using an account other than admin is a very good call since it prevents most malware from messing around with your device’s sensitive functions. As always, if you have any questions or rants, do shoot me a comment. Cheers!


