


 Network Security
 Vulnerability Management
 Privileged Access Management
  Endpoint Security
 Threat Hunting
 Unified Endpoint Management
 Email & Collaboration Security


Contents:
Nowadays, privacy’s all that matters – passwords, physical keys, hints, user approval; everything revolves around this concept, and it’s for the best considering how many mishaps have popped up recently.
One would certainly recall Amazon’s latest voice recording pow-wow, not to mention the fact that even Facebook has been accused more than once of selling its mined data to shady third parties.
Anyway, since everyone’s concerned about stronger passwords and other safety countermeasures, we certainly overlooked one of the simplest and most effective ways to ensure data privacy: hiding files or folders.
It’s fairly easy to do and, as a bonus, hidden files and folders cannot be accessed remotely. So, without further ado, here’s how to hide a folder on Windows 10.
How to hide a folder on Windows 10 using File Explorer
Now, as you might have guessed, the easiest way to hide a file or folder in Windows 10 is through File Explorer. Not very pretty, but who cares as long as the job gets done.
There’s also a “sneakier” way of doing just, but I’ll get into that a bit later. Let’s see about hiding a folder in File Explorer.
Step 1. Create a new folder. You can name it anything you like. I would advise you to create the new folder on a disk partition other than the one you’ve installed Windows 10 – it’s never a good idea to temper with that part of your computer, regardless of the purpose.
Step 2. Add whatever files you want to be hidden to the newly-created folder. For the purpose of this article, I’ve created a new folder called “Now you see me” and added two videos and a .jpeg file.
Step 3. When you’re done gathering that which must be hidden from prying eyes, close the folder.
Step 4. Right-click on “Now you see me”.
Step 5. Select Properties.
Step 6. Under Attributes, check the box next to “Hidden”.
Note: folders, albeit hidden, will still be indexed by Windows. To prevent the OS from including both the folder and its contents, click on the Advanced tab, and deselect the following options: File is ready for archiving and Allow this file to have contents indexed in addition to file properties. Click Ok to save changes and then hit Apply.
Step 7. Click Apply.
Note: if your folder includes subfolders, a message prompt will appear on your screen. If you want to hide the contents and not just the ‘parent’ folder, select the second option (Apply changes to this folder, subfolders, and files). Click on the Ok button to continue.
Step 8. Click Ok to close the window.
Step 9. Profit!
Congrats! You’ve hidden your very first folder. However, it’s for naught to hide a folder if your admin account has the “show hidden files” option active. By default, it should be turned off, but better sure than sorry. To see if the option’s switched on, follow these steps.
Checking if a file\folder is hidden
Step 1. Go to File Explorer. You can do that by double-clicking on the File Explorer icon on your desktop or by pressing the Windows + E buttons.
Step 2. Go to View.
Step 3. Select Options (it’s in the far-right corner, right next to the show\hide section.
Step 4. From Options, select Change folder and search options.
Step 5. Click on the View tab.
Step 6. Scroll until you see the Hidden files and folder drop-down menu.
Step 7. Check to box next to the “don’t show hidden files, folder, or drives” option.
Step 8. Click Apply to commit changes.
Step 9. Press the Ok button to close the window.
See how easy that was? Well, because I do like to play it dangerously, I’m going to show you another way to hide your files and folders, using the command prompt. Let’s dig right into it.

Hide a Folder on Windows 10 Using Command Prompt
Ready? First, you’ll need to figure out what files and folders you want to hide. For the purpose of this article, I’ve created a second folder in My Documents, which I named “Gib shares”. Inside, I’ve dumped a .jpeg file called crazyrussian. So, now, I will try and hide crazyrussian.jpeg using the command prompt.
Step 1. Ensure that all the files are where they’re supposed to be.
Step 2. Click on Start and type in “command line”.
Step 3. Click on the Command Line icon or hit Enter to continue.
Step 4. In CMD, type in or paste the following line:
attrib C:\Users\V\Documents\Gib shares\crazyrussian.jpg +s +h
Step 5. Hit Enter to continue.
Note: when performing the operation, you should swap the above-mentioned path with the location of your folder. If you’re too lazy to type in the whole path of the folder, you can always use File Explorer.
Open the folder using Explorer, select the path, and copy it. Go back to the command prompt and simply paste the line. Now you only need add the file you wish to conceal and +s and +h attributes.
By the way, +s stands for System file, which means that it will be used by the operating system, while +h, which stands for hidden, instructs the OS that the file attributed this way will not show up in the GUI nor be indexed by Windows’ search engine.
Now, if you want to undo the changes (unhide a hidden file), you only need to change the operators in front of the “s” and “h” attributes. So, instead of a “+”, you should “-“. Let me give you a quick example:
attrib C:\Users\V\Documents\Gib shares\crazyrussian.jpg -s -h
That’s about it on how to hide files on Windows 10. Of course, being the nitpicking kind, I’ve searched for even more ways to hide stuff. Enjoy!
How to hide disk drives using Regedit
Source: The Windows Club
You know the saying: if you want to hide something, do it in plain sight, or hide the entire disk drive. It can be achieved, but it’s a bit tricky since it requires tampering with some hex values in the registry editor.
Don’t worry too much about doing something that may endanger your data. However, I would advise you to create a restoration point before beginning the procedure. All done? Great! Let’s get this done.
Step 1. Click the start button and search for Run. You can also press down the Windows + R button to bring up the run manager.
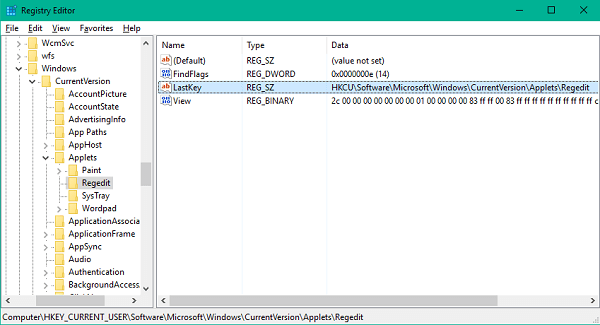
Step 2. Type in Regedit and press Ok.
Step 3. Take a good look at the left pane. Those are the policies that control every aspect of your operating system.
Step 4. Double-click on HKEY_LOCAL_MACHINE
Step 5. Double-click on Software.
Step 6. Double-click on Microsoft.
Step 7. Double-click on Windows.
Step 8. Double-click on Current Version.
Step 9. Double-click on Policies.
Step 10. Double-click on Explorer.
Sounds rather complicated. Let me sum up the path for you:
HKEY_LOCAL_MACHINE\Software\Microsoft\Windows\CurrentVersion\Policies\Explorer
Step 11. Right-click on Explorer.
Step 12. Highlight New and then left-click on DWORD (32-bit) value.
Step 13. Name this value NoDrives. Hit Enter to continue.
Step 14. On the right side of the screen, double-click on NoDrives.
Step 15. Under Base, check the box next to Decimal.
Step 16. Here’s where it may get tricky. You will need to edit the value data field to correspond with the decimal representation of your drive’s letter.
For instance, the corresponding decimal for drive letter G: is 64. Check out this table to find the correct decimal representation of the drive letter you want to hide.
Step 17. Click Ok.
Step 18. Restart your computer for the changes to go into effect.
The drive letter of your choice is now hidden. Now, if you want to revert the changes, simply retrace your steps, delete the NoDrives value, and restart.
There’s another way to hide a drive letter. This method involves using the disk management agent, the same one you use for partitioning, formatting disk drives, change the file system, or delete them.
How to hide a drive letter using disk management

Source: Microsoft Windows
Ready for more sneakiness? That’s the spirit! Up next, I’m going to show you how to hide a disk drive using Microsoft’s disk management tool which, by the way, is very useful for a thing like extending/shrinking volumes or retrieving technical info on a disk drive. Let’s jump right into it.
Step 1. Call up the Run window. See the above section for info on how to do that.
Step 2. In the dialog box, type in diskmgmt.msc
Step 3. In the disk management window, select the drive letter you want to hide.
Step 4. Once the drive is selected, it should appear in the bottom part of the screen.
Step 5. Right-click on the drive letter and select Change Drive Letter and Paths.
Step 6. In the Change Drive Letter and Paths menu, left-click on the drive letter, and then click on Remove.
Step 7. When prompted, click on Yes to continue. That’s it! If you want to unhide the drive:
Right-click on the active disk =>select Change Drive Letter and Paths => click Add =>select the Assign the following drive letter option => choose a drive letter => hit OK.
Bonus
Because you were patient enough to read the article all the way to the end (hope I didn’t bore you to death), I’m going to show you how to password-protect a folder in Window 10.
Sure, it’s still visible, but without the appropriate passkey, it won’t be accessible. So, because talk’s cheap, let’s get cracking.
Step 1. Gather whatever stuff you would like to lock in your password-protected folder (documents, videos, audio clips). For ease of access, I would recommend creating a new folder and dumping everything in there.
Step 2. When ready, right-click anywhere on the screen (make sure the folder’s open), select new, and highlight Text document.
Step 3. Double-click on the newly created text document.
Step 4. Paste the following text in the text document:
cls

@ECHO OFF

title Folder Locker

if EXIST "Control Panel.{21EC2020-3AEA-1069-A2DD-08002B30309D}" goto UNLOCK

if NOT EXIST Locker goto MDLOCKER

:CONFIRM

echo Are you sure you want to lock the folder(Y/N)

set/p "cho=>"

if %cho%==Y goto LOCK

if %cho%==y goto LOCK

if %cho%==n goto END

if %cho%==N goto END

echo Invalid choice.

goto CONFIRM

:LOCK

ren Locker "Control Panel.{21EC2020-3AEA-1069-A2DD-08002B30309D}"

attrib +h +s "Control Panel.{21EC2020-3AEA-1069-A2DD-08002B30309D}"

echo Folder locked

goto End

:UNLOCK

echo Enter password to Unlock folder

set/p "pass=>"

if NOT %pass%==Your-Password-Here goto FAIL

attrib -h -s "Control Panel.{21EC2020-3AEA-1069-A2DD-08002B30309D}"

ren "Control Panel.{21EC2020-3AEA-1069-A2DD-08002B30309D}" Locker

echo Folder Unlocked successfully

goto End

:FAIL

echo Invalid password

goto end

:MDLOCKER

md Locker

echo Locker created successfully

goto End

:End
Step 5. To set your password, delete the line reading “Your Password Here” and replace it with anything. Here’s how it should look:
If NOT %pass%==Youshallnotpass goto FAIL
Step 6. Click on File and select the Save As option.
Step 7. Under Save as Type, select All Files.
Step 8. Under file name, delete everything and replace it with FolderLocker.bat
Step 9. Click Save and exit the document. If you receive a prompt regarding the extension change, click on Yes to confirm.
Step 10. In the Explorer Window, double-click on FoldeLocker .bat executable. You will see that the Locker folder will appear in the same location as the hide-to-be files.
Step 11. Place the files you want to password-protect in the Locker folder.
Step 12. Double-click again on the FolderLocker .bat executable.
Step 13. A command prompt window will appear with the following message: “Are you sure you want to lock the folder (Y/N)”
Step 14. Type in “Y” and hit Enter. The command prompt window will now be closed.
Step 15. To unlock the contents of the Locker folder, double-click on the FolderLocker .bat executable. A new command prompt window will appear asking you to type in the password. Enter the password, hit Enter, and voila! you now have access to your footlocker. Enjoy!
Wrap-up
Well, that’s about all I could muster up on how to hide folders on Windows 10. Of course, there are always more ways to do just that, but it involves tinkering with third-party tools which I found to be rather hard to use. Anyway, for any comments, rants, or beer donations, don’t be shy and shoot me an email.


