Contents:
And because you’ve seen just how easy it is to set up a new user account on Windows, in wishing not to disregard my fellow Mac users, I’ve decided to write another short and sweet piece on how to create a new user on your Mac machine. Very much like the first article, I’m going to show you various ways to set up accounts, manage those already on the machine, tinker with the parental controls, delete users, and more. So, without further ado, let’s dig right into it.
How to Create a New User on Mac using Users & Groups menu

Doesn’t matter if you’re a new or a seasoned Mac user; creating another account or changing privileges is a very straightforward process. Eager to whip up a new Mac user account? Just follow the steps below to quickly add a new user.
- Step 1. Click on the Apple Icon. If you’ve trouble finding it, look in the upper-left corner of your screen.
- Step 2. From the drop-down menu, select System Preference.
- Step 3. Click on Users & Groups.
- Step 4. To make changes to the Users & Groups menu, you’ll first need to unlock it. To do that, click on the padlock button located in the bottom-left corner of the Users & Groups window.
- Step 5. Type in the password associated with your admin account and press the Unlock button when ready.
- Step 6. To add a new user on Mac, click on the little plus button. You’ll find it on the left side of the Users & Groups windows, beneath the house pictogram.
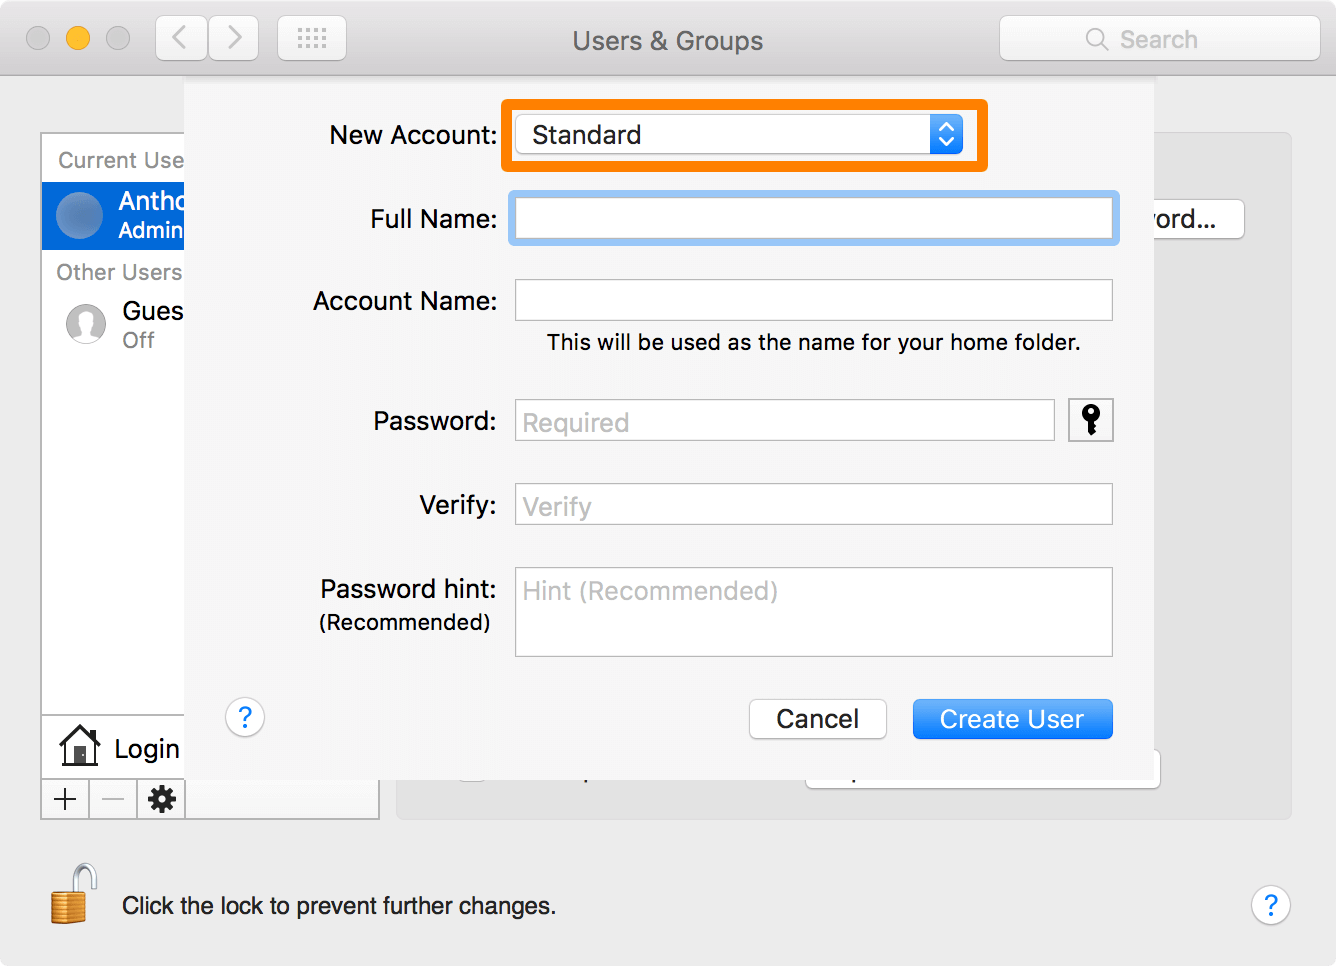
- Step 7. Select your account type. You can choose between sharing-only, groups, standard, and managed with parental controls.
- In Standard mode, the new user will be able to install apps and change general settings. Still, you won’t be able to create other user accounts, uninstall apps or mess around with the other users’ settings.
- In Managed with Parental Control mode, you’ll be in full control of what happens on that user account. For instance, the parental control feature will allow you to place time limits, bar access to certain websites or restrict specific user-defined actions such as adding a new contact without the admin’s pre-approval. Use this type of account if you want your kid to safely use the machine.
- In Sharing Only mode, the newly created user will be able to view and access shared files from afar, but that’s about it. He or she will not be able to log in to the computer, change user settings, create new accounts, or perform other actions. If you don’t want to wrap your head around this, you can always use services like Mail Drop or AirDrop to share stuff. This way, you’ll limit the user’s access to your computer.
- In Groups mode, you will be able to give the same access privileges to more than one user. For instance, if your co-workers need quick access to some of your documents, you may be able to create an “out of office” group for them with limited privileges.
- Step 8. When you’re done selecting the account type, write in your full and account names in the appropriate fields.
- Step 9. Set an appropriate password. Now, if you already have an Apple ID account, you can choose to sign in to your newly created local Mac account with it. Alternatively, if you don’t want to use the same password for both (which is highly advisable!), just check the Use separate password option. Still, if you really can’t hold on to another password, just click the Use iCloud password option to login into your account using your iCloud credentials. If you’ve used the Use separate password option, type in your new passphrase in the field below (please don’t go with what works, because that’s how malware happens). Type it in again to confirm and then use the last field to set a hint. Bear in mind that this step’s optional, but I found out that when trying to manage multiple passwords, a hint really helps get the gears spinning.
- Step 10. Review the details. When you’re done, hit the Create Account button to complete the process.
Congrats! You have created a new user on your Mac computer. However, this is hardly the end of the road. There are plenty more you can do with your newly created account. As I might have mentioned, accounts other than the admin can take special attributes. For instance, enforcing parental controls on a newly made account grants you better control over it.
More on Mac Parental Controls
No, parental controls are not just for children; it’s a great way to curb anyone’s computer time, adults included. With this feature, you can bar certain websites (ahem!), restrict access to some functions, or even prevent them from installing some applications. To tinker with the parental controls, when you’re done creating the account, just press the button labeled parental controls (duh) in the right window and choose the options tailored to your needs.
In Mojave, the parental controls menu even features an allow to play multiplayer games. What does it do? Well, if activated, the account holder can play any type of online games, obviously. Tired of hearing a lot of “rush Bs” and “I pwned you, noob”? No problem – just untick the multiplayer games box and its buh-bye rancid humor, remarks about one’s birth giver, and other ‘niceties’ associated with online games. Some other stuff you can play within parental control mode:
- Allow or block use of the in-built camera.
- Limit mail use to contacts list. Use the Manage button to choose trusted contacts.
- Limit applications on your Mac. Use the Allow Apps drop-down menu to select the apps your new user will be able to manage, access, and control.
- Other noteworthy functions: web pages, stores, timer, and privacy.
This covers the part on how to create a new user account on Mac using the Users & Groups menu. One more thing before I head into the next section. You can always upgrade a standard or parental control-type account to admin.
Under Users & Groups, select the newly created account and check the box next to the Allow user to administer this computer option. You will be required to enter the username and password associated with an active admin account. Don’t forget to click on the unlocked padlock button in the lower-left corner of the screen to confirm changes and prevent further tampering.
How to create a new user on Mac using Terminal

Source: Computer Skills
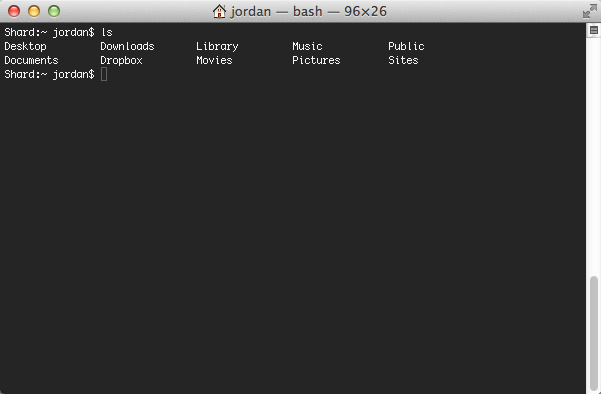
As you might have guessed, there’s more than one way to create a new user on Mac. You’re able to use Mac’s Terminal (the equivalent of CMD in Windows), to create an account. Here’s what you will need to do.
- Step 1. Open Terminal. You can do that by clicking on the Terminal icon from the Utilities menu. Just drag down the Finder toolbar to reveal all the utilities.
- Step 2. Type in the following line:
sudo dcsl . -create\Users\Username Usershell /bin/bash
Hit Enter to continue. - Step 3. Type in the following line:
sudo dscl . -create/Users/username RealName “Your new Username”
Of course, you will need to change the “Your new Username” string with the user’s real name. When ready, smash that Enter button to continue. - Step 4. Type in or paste the following line:
“sudo dscl . -create/Users/username UniqueID 1001
Please note that the UniqueID’s attribute must be different for each user (i.e. Marc Smith and John LeGrand, two fictional users, cannot both have 1001 as the UniqueID). - Step 5. Type in or paste the following line:
sudo dscl . -create/Users/username PrimaryGroup ID 1000
Hit Enter to continue. - Step 6. Type or paste this line:
sudo dscl . – create/Users/username NFSHomeDirectory/Local/Users/username
This command will allow you to whip up a home folder for the newly created user. - Step 7. Type in or paste the following line:
sudo dscl . -passwd\Users\username password
Of course, you will need to replace the “password” string with anything your heart desires. When ready, press Enter to continue. - Step 8. (Optional) To grant the newly created user admin privileges, you will need to type in or paste the following line:
sudo dscl . -append/Groups/admin GroupMembership username
Press Enter to continue.
Congrats! You now know how to create a new Mac user using the Terminal. Get your lines straight, write the lines in order, and everything will be hunky-dory.
How to create a new Mac admin account by using Single User Mode
If you ever get locked out of your admin account and can’t get in, the fastest way to get back in the game would be to use what’s called a spare admin account. Hindsight dictates that you should do this before the unfortunate ‘lock-out’ happens, but then life happens.
Don’t worry; you’re still able to create a spare Mac account even if you’re locked out. However, this requires running a startup environment called the Single User Mode; think of it like Mac’s version of Windows safe mode with command prompt, only that, in this case, CMD is replaced by the Terminal. Here’s what you’ll need to do.
- Step 1. Restart your Mac.
- Step 2. During the boot screen, hold down the CMD+S keys.
- Step 3. Wait for the Terminal to finish displaying the command lines.
- Step 4. Scroll down and type in the following line after “:/ root#”:
/sbin/mount -uw/
Hit enter to continue. This command will allow you to mount or load the files and folders on your computer. - Step 5. It’s now time to start your Mac into the Single User mode. This is a fancy way of saying that you’re going to trick your computer that this is its first boot. In order to do that, you’ll need to delete a special file that tells the Mac if this is its first boot or not. Don’t worry – removing this file will not turn your Mac into a paperweight.
- Step 6. Type in or paste the following line:
rm /var/ db/.applesetupdoneWhen ready, press the Enter key. - Step 7. Reboot your Mac. Type
rebootthen press Enter. - Step 8. When it’s done loading, the account creating screen will appear, prompting you to fill in the details of your new admin account. Type in your full name, account name, password + confirmation, and a hint. Once you’re done, hit enter to enter the account selection section.
- Step 9. Click on the newly created user account.
Wrap up
Creating a new user account on Mac has never been easier. Well, at any rate, if you stick to the Users & Groups menu and don’t start messing around with the console. Any takeaways? Sure, why not: follow the on-screen instructions carefully, use the Terminal when you absolutely have to and don’t forget to create a backup admin account before stuff happens. As always, for comments or rants or beer donations, don’t be shy and shoot me an email.


 Network Security
 Vulnerability Management
 Privileged Access Management
  Endpoint Security
 Threat Hunting
 Unified Endpoint Management
 Email & Collaboration Security


